Introduction. This page describes the home-made panoramic tripod head ("pano head") that I sometimes use when taking panoramic images with my digital SLR (DSLR) camera. For an explanation of why such a contraption is useful, have a look at the explanation I wrote describing the earlier pano head I used created for my old Nikon 990 camera.
Materials/fabrication. I'm not an engineer, and I'm not particularly handy with tools. I wanted to create something that used off-the-shelf products, and required a minimum of fabrication. Apart from cutting some plywood and drilling one hole, I didn't have to do any work other than assembling the pieces.
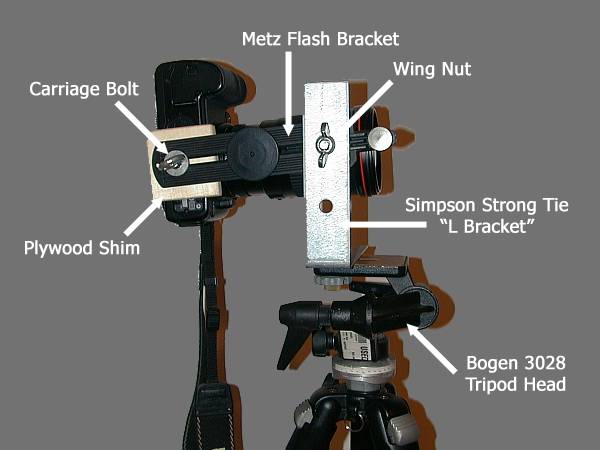
The pano head sits on top of a Bogen 3028 tripod head. I imagine that almost any tripod head would work OK, but I like the fact that the T shaped slot allows the head to slide back and forwards on the tripod head.
The pano head consists of two main parts...an L shaped bracket I bought from Home Depot (Simpson Strong Tie A61, SKU #4431504800), and a Metz flash bracket ("Metz Quick Release Camera Bracket for 45, 50, 60 series") I bought from Adorama for about $23. The L bracket is connected to the tripod head using a wing nut and a washer (avaialable from any hardware store). The Metz flash bracket is also attached to the L bracket with a (larger) washer and wing nut as well.
The holes that are pre-drilled in the L bracket are at just the right location to position the camera's exit pupil over the rotation axis of the tripod when used with the current crop of DSLR cameras.
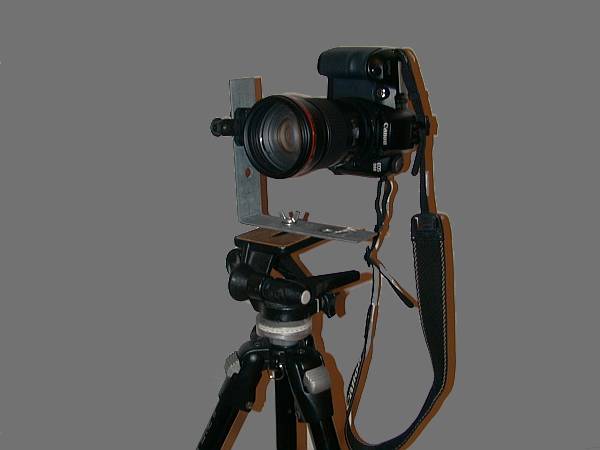
When using lens with a small diameter (like the 50mm lens), I use the rounded screw that comes with the Metz bracket to attach the camera to the bracket. When attached this way, the camera can slide forwards and backwards to find the precise nodal point. When using a larger diameter lens (like the a 200mm lens picture below), I mount a plywood "shim" between the Metz bracket and the camera. I use a carriage bolt (available from any hardward store) to attach the camera to the plywood shim and Metz bracket.
It has been a year since I constructed this device and I can't remember all the dimensions precisely, although I doubt that it would take longer than 30 minutes at a good hardware store to find the right parts. The most expensive piece of the whole contraption was the Metz flash bracket, and the total cost was about $25-$30.
Problems. I've used this device for about a year now, and it works pretty well. The only real problem is that the device is quite flexible and moves around in windy conditions. Also, this device fits my camera very well, but may not fit cameras with different dimensions.
 |
| Underside view of pano head. |
 |