Introduction. This page illustrates the processing steps used by PTAssembler to produce "stacked" and "blended" panoramic images. This page is not a complete discussion on how to operate PTAssembler (please consult the PTAssembler documentation for that information), but describes several examples of how PTAssembler can be configured to process images into a stacked/blended panorama. The diagram below illustrates the standard processing sequence used by PTAssembler to generate the images in these examples. The stack IDs and number of images per stack in the diagram are for illustrative purposes only...different panoramas may have more or less images. A more advanced approach using a technique called layer blending is described at the end of this document.
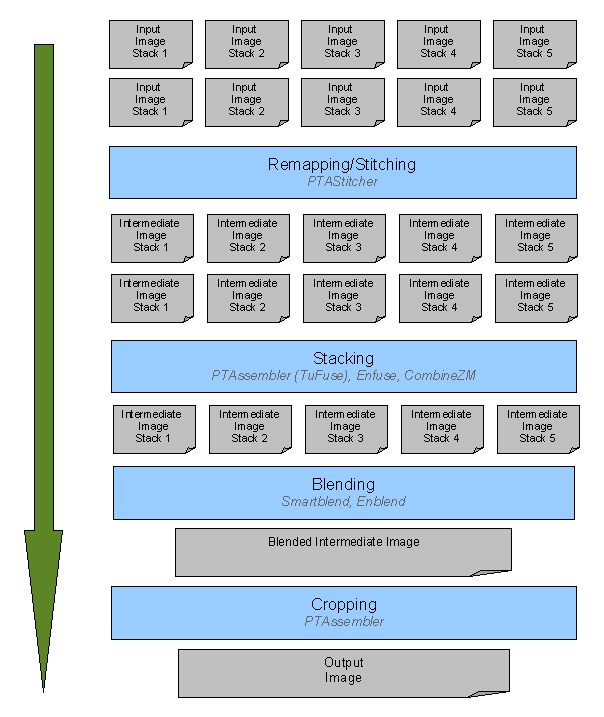
Overview of processing sequence used by PTAssembler.
Image Capture. In normal lighting conditions, I would photograph a scene like this with one row of 5 images. However, in order to capture the full range of shadows and highlights in this contrasty scene, I took 2 different exposures at each of the 5 different potisions in the row. As a result, I took a total of 10 different images with the intention of "exposure blending" the images to create a well exposed composite image.
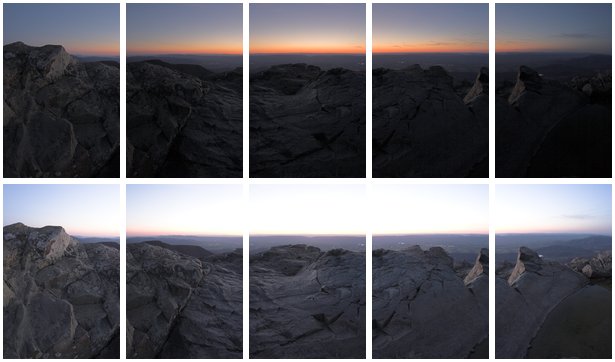
10 source images. Two exposures were taken at each of the five positions.
Remapping. The first step in PTAssembler's processing is to "remap" the image using the Panorama Tools stitching program. This rempping process "warps" the images in such a way so that they can be aligned perfectly. Without this remapping process, the images will not join together correctly.
10 remapped images. Image have been remapped by stitching program.
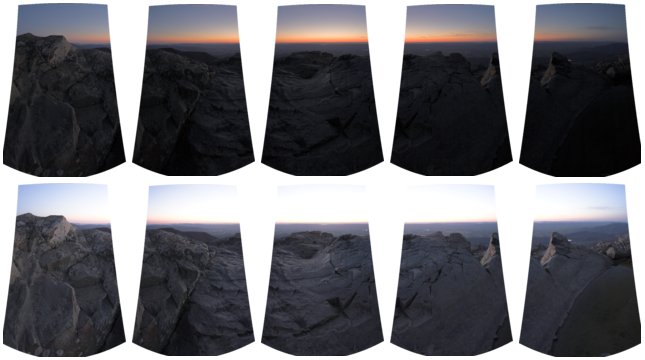
Stacking. After remapping, PTAssembler "stacks" the images. PTAssembler automatically determines which images were taken at the same position and creates one stack wherever multiple images were captured at the same position. In this case, PTAssembler correctly determined that there were 5 stacks, with each stack containing 2 images. PTAssembler processes these 10 images (5 stacks containing 2 images each) into 5 "stacked" images. In this example, PTAssembler used TuFuse (PTAssembler's own internal stacking program) to perform the stacking, which produced 5 "exposure blended" images.
5 images after stacking. 10 images have been "stacked" into 5 images.
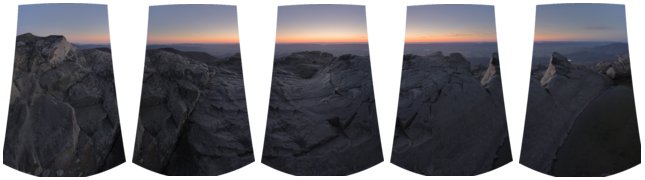
Blending. After stacking, the remaining 5 images are blended into one seamless composite. In this example, PTAssembler invoked Smartblend to perform the blending.

1 blended image. Images have been blended into one seamless composite.
Cropping. The final step in the process is to crop away any remaining "black space" from around the edge of the image. PTAssembler determines the best cropping and produces the final "remapped, stacked, blended and cropped" image.
1 final image. Remaining black space around edge of image has been cropped.
Image Capture. This is a more complex example illustrating a scene where only some of the images needed to be exposure blended. In order to capture the full range of shadows and highlights in this contrasty scene, I took 3 different exposures at each of the 5 different potisions in the top row. The bottom row did not contain such a great contrast range, so I only needed to take 1 image at each position. As a result, I took a total of 20 different images.
20 source images. First three rows contain three different exposures of the same five scenes.
Remapping. The 20 source images are remapped by the stitching program.
20 remapped images. Image have been remapped by stitching program.
Stacking. After remapping, PTAssembler "stacks" the images. In this case, PTAssembler correctly determined that there were 5 stacks, with each stack containing 3 images. PTAssembler processes these 15 images (5 stacks containing 3 images each) into 5 "stacked" images. In this example, PTAssembler invoked Tufuse (PTAssembler's own internal stacking program) to perform the stacking, which produced 5 "exposure blended" images. Note that the bottom row of 5 images is unchanged...I only photographed one image at each position in the bottom row, so no stacking was performed on those images.
10 images after stacking. First 15 images have been "stacked" into 5 images. Bottom row is unchanged.
Blending. After stacking, the remaining 10 images are blended into one seamless composite. In this example, PTAssembler invoked Smartblend to perform the blending.
1 blended image. Images have been blended into one seamless composite.
Cropping. The final step in the process is to crop away any remaining "black space" from around the edge of the image. PTAssembler determines the best cropping and produces the final "remapped, stacked, blended and cropped" image.
1 final image. Remaining black space around edge of image has been cropped.
Image Capture. In this example, I wanted to ensure that the entire scene (both the rocks in the foreground and the hills in the background) was in focus. Using a 70mm lens, I could not stop the lens down enough to ensure that all elements in the scene were well focused. Instead, I took multiple shots at most positions in the scene where both foreground and background elements were present with the intention to perform "focus blending" and create an "extended depth of field" panoramic image. In some cases only background elements were present, and I only needed to take a single image.

51 source images. Two rows of images with one or more images taken at each position.
Remapping and Stacking. After remapping (not illustrated here), PTAssembler "stacks" the images. PTAssembler automatically determined that there were 13 stacks with 2 or more images in each stack, and processed each stack into a single image. Note that in 7 positions in the top row, only one image was taken and no stacking was needed or performed. In this example, PTAssembler invoked Tufuse (PTAssembler's own internal stacking program) to perform the stacking, which created one "extended depth of field" image for each stack.
20 images after stacking.
Blending. After stacking, the remaining 20 images are blended into one seamless composite. In this example, PTAssembler invoked Smartblend to perform the blending.
1 blended image. Images have been blended into one seamless composite.
Cropping. The final step in the process is to crop away any remaining "black space" from around the edge of the image. PTAssembler determines the best cropping and produces the final "remapped, stacked, blended and cropped" image.
1 final image. Remaining black space around edge of image has been cropped.
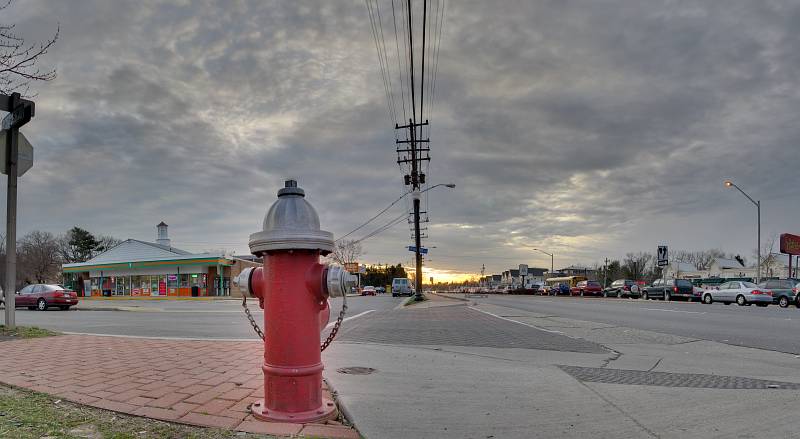
Image Capture. In this example, not only did the scene contain a large dynamic range (i.e. a single exposure could not capture detail in the sky and ground adequately), but I also wanted to ensure that the entire scene (both the hydrant in the foreground and sunset in the background) was in focus. My goal was to create a focus and exposure blended panoramic image. In order to achieve this, I took multiple exposures at each of the six positions in this two row panorama. In the top row, I took a total of nine images (three exposures at each of the three positions) to capture the full range or light and dark. In the bottom row, I varied both the exposure and focus, capturing six images at each of the three positions.
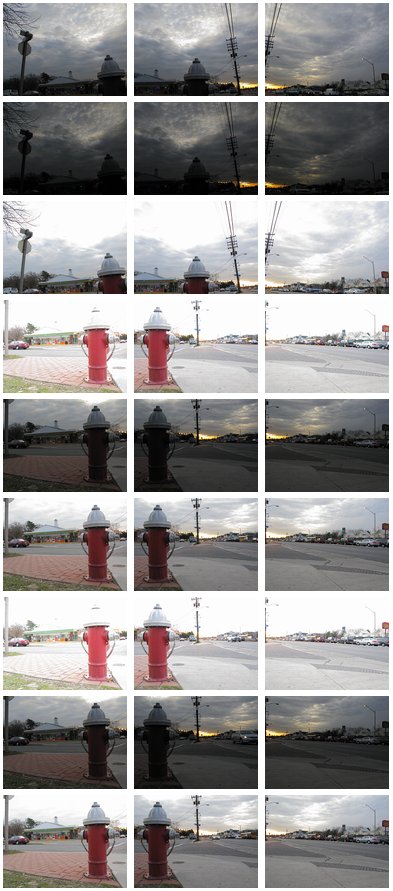
14 source images. Two rows of images with one or more images of different exposures and focus settings taken at each position.
Remapping and Stacking. After remapping (not illustrated here), PTAssembler "stacks" the images. PTAssembler automatically determined that there were 6 stacks with 2 or more images in each stack, and processed each stack into a single image. In this example, PTAssembler invoked Tufuse (PTAssembler's own internal stacking program) to perform the stacking. Tufuse was able to determine which images in each stack should be focus blended, and which images should be exposure blended, and produced one "exposure and focus blended" image for each stack.
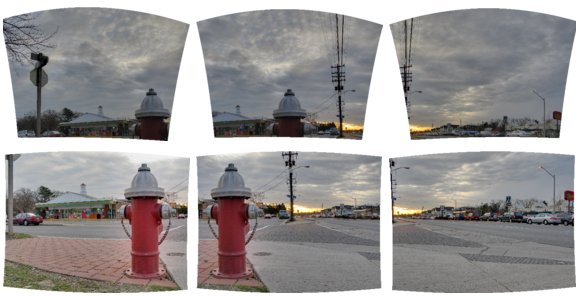
6 images after stacking.
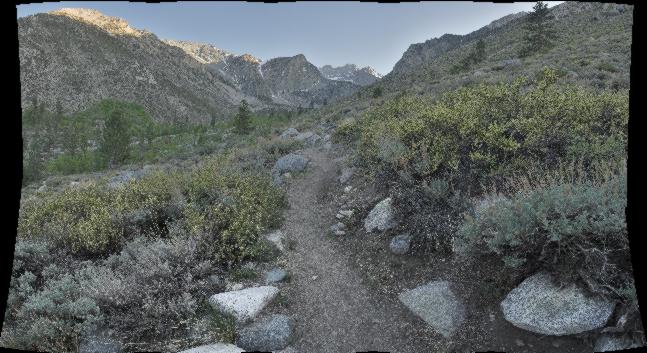
Blending and Cropping. After stacking, the remaining 6 images are blended by Smartblend into one seamless composite, and cropped by PTAssembler to trim any remaining "black space" from around the edge of the imagethe edges. The resulting image is one in which both exposure blending and focus blending has been performed in a single operation.
1 final image. Remaining black space around edge of image has been cropped.
This following section describes an advanced enhancement to the processing approach described above using a technique called "layer blending". PTAssembler can be configured to blend some (or all) of the remapped images prior to stacking. This is called "layer blending". This is an advanced technique, and is generally only appropriate for special cases where the standard workflow does not produce the desired results. For example, depending on the subject matter, it may be the case that the stacking step produces a more natural/pleasing result by stacking a larger region of the scene than the area contained in a single stack of input images. In this case, several stacks can be "layer blended" before being stacked.
The diagram shows there is one additional processing step between the remapping/stitching stage and the stacking stage. This processing step is layer blending. Images that are assigned the same layer ID in PTAssembler are blended together during the layer blending processing step. In this diagram, the 10 input images are blended into 4 layers during the layer blending processing step. The 4 layers are stacked to create 2 images during the stacking processing step. Finally, the 2 images are blended and cropped to create the final image during the blending and cropping processing steps.
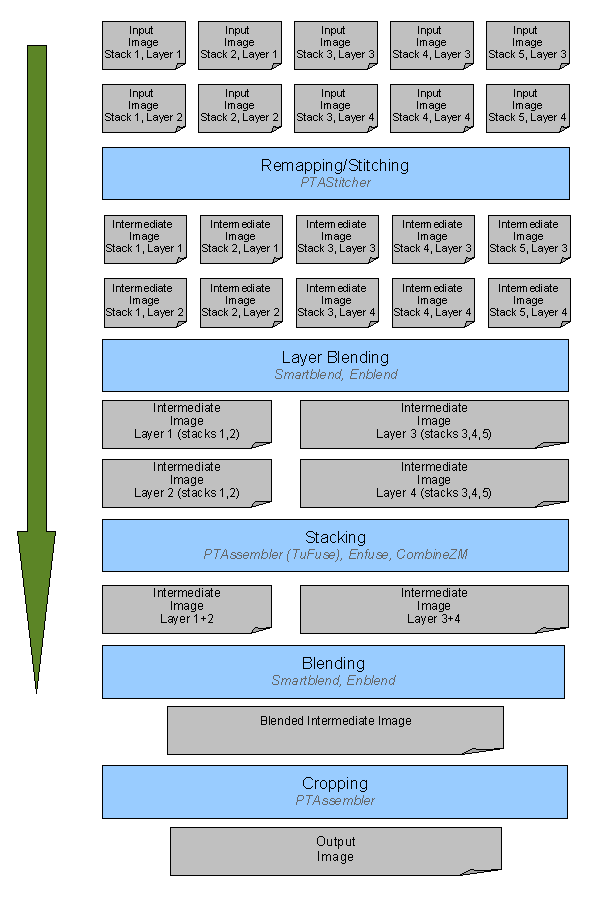
Processing sequence used by PTAssembler, including Layer Blending.
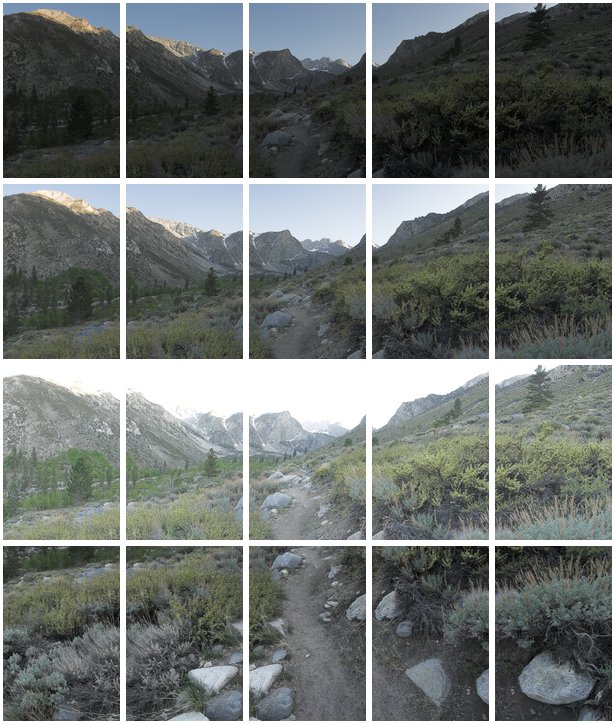
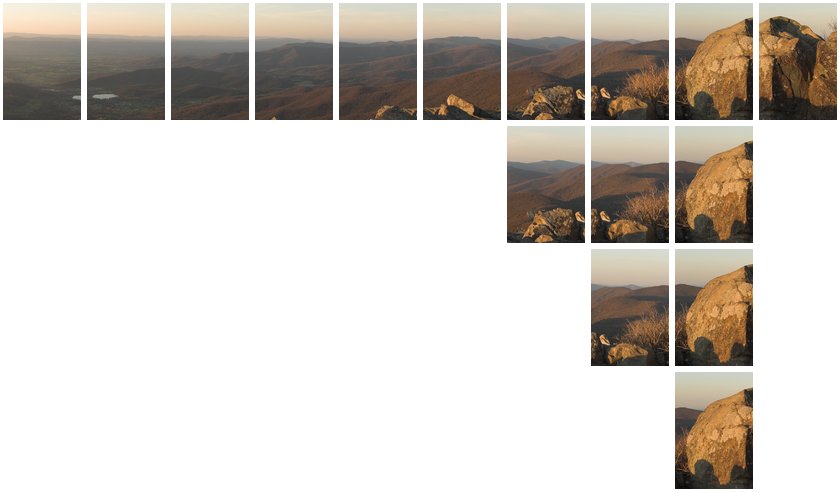
Image Capture. In this example, I wanted to capture the sunset colors in the sky and a well illuminated foreground. I took a total of 14 images, 7 images at one exposure, and another 7 at a different exposure. The rock at the left edge of the scene suggested to me that exposure stacking would produce a more pleasing result if I used layer blending prior to stacking to allow TuFuse to operate on a larger region than a single stack at a time.
In PTAssembler I assigned Stack IDs and layer IDs to each image and enabled the layer blending option. Both images in the first column were assigned stack ID 1, images in the second column were assigned stack ID 2, and so on. Images in the left three columns of the top row were assigned layer ID 1. Images in the right four columns of the top row were assigned layer ID 2. Images in the left three columns of the bottom row were assigned layer ID 3. Images in the right four columns of the bottom row were assigned layer ID 4.
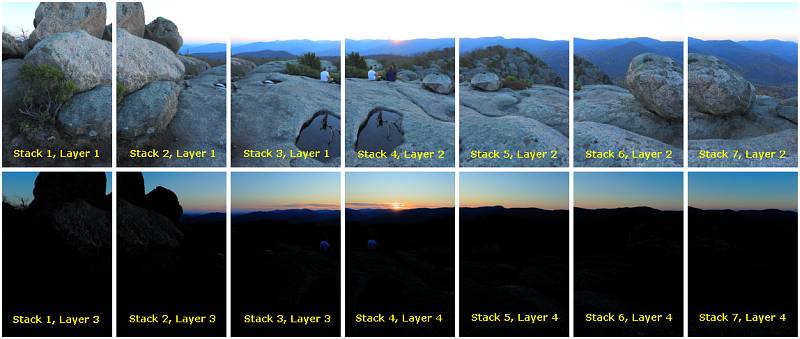
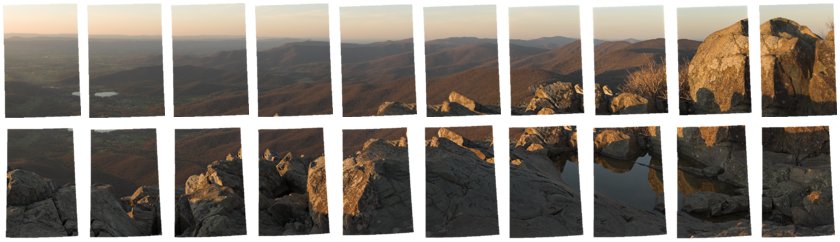
14 source images. Two rows of images, with each row using a different exposure.
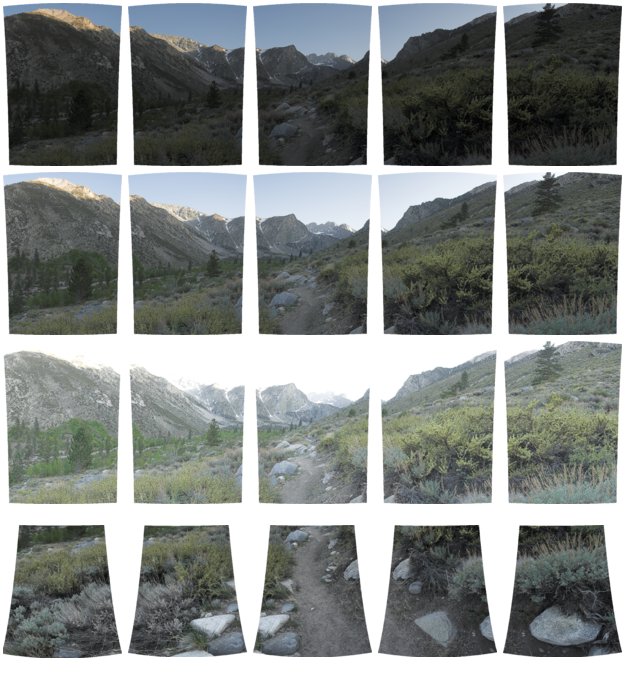
Remapping and Layer Blending. After remapping (not shown here) and layer blending, the output is 4 images, corresponding to the 4 layer IDs assigned in PTAssembler.
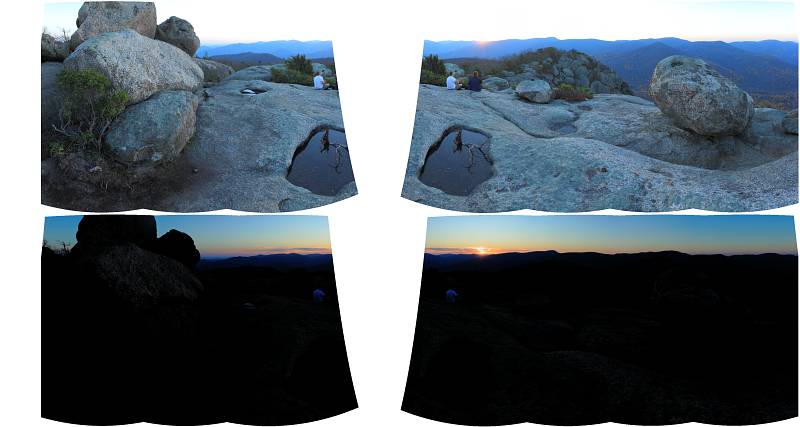
4 images after layer blending. All images with the same layer ID have been blended into layers.
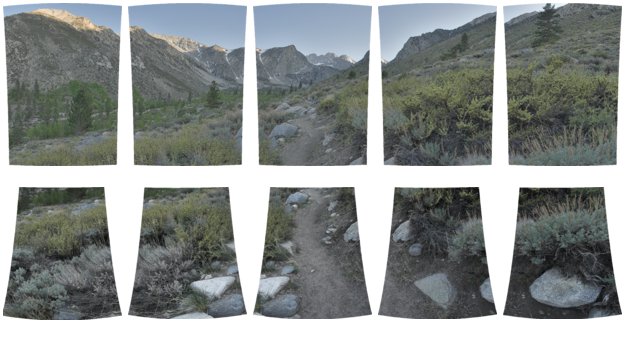
Stacking. After layer blending, PTAssembler "stacks" the images. Based on the stack and layer IDs assigned above, PTAssembler stacks layers 1 and 3 together and stacks layers 2 and 4 together. The result is two exposure blended images. In this example, PTAssembler invoked TuFuse (PTAssembler's own internal stacking program) to perform the stacking. TuFuse was able to determine that the images should be exposure blended (rather than focus blended) based on the exposure in each image.
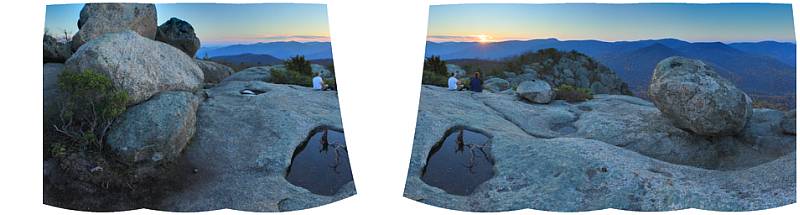
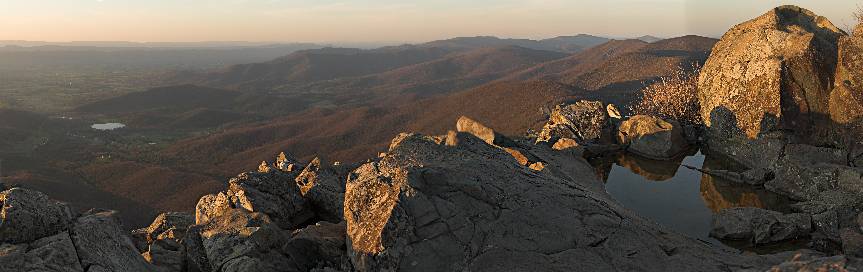
2 images after stacking.
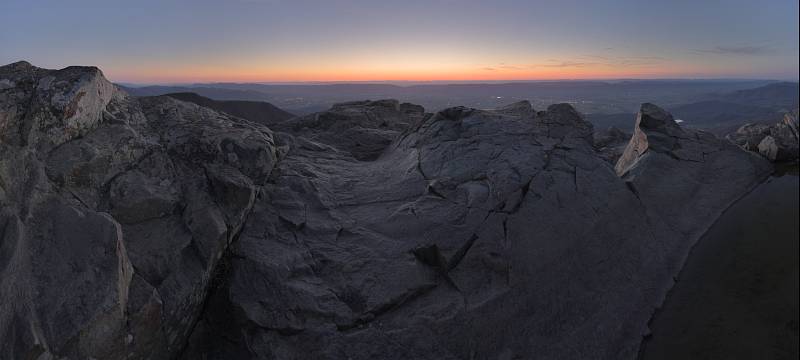
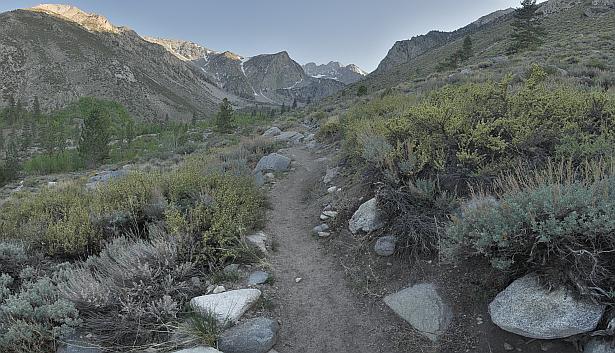
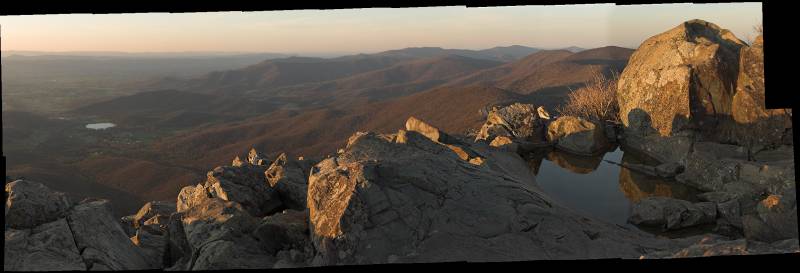
Blending and Cropping. After stacking, the remaining 2 images are blended by Smartblend into one seamless composite, and cropped by PTAssembler to trim any remaining "black space" from around the edge of the image.
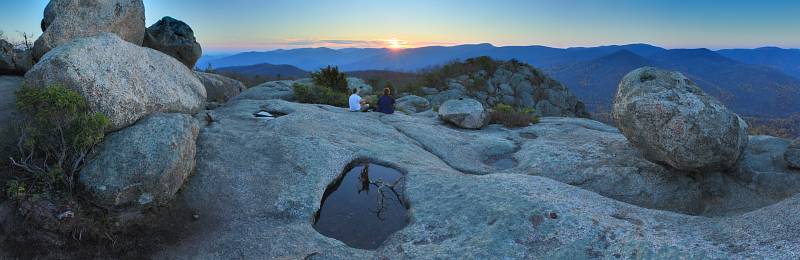
1 final image. 2 images have been blended, and remaining black space around edge has been cropped.